Stop Build Day
Dag(en)
:
Uur(s)
:
Minute(s)
:
Second(s)
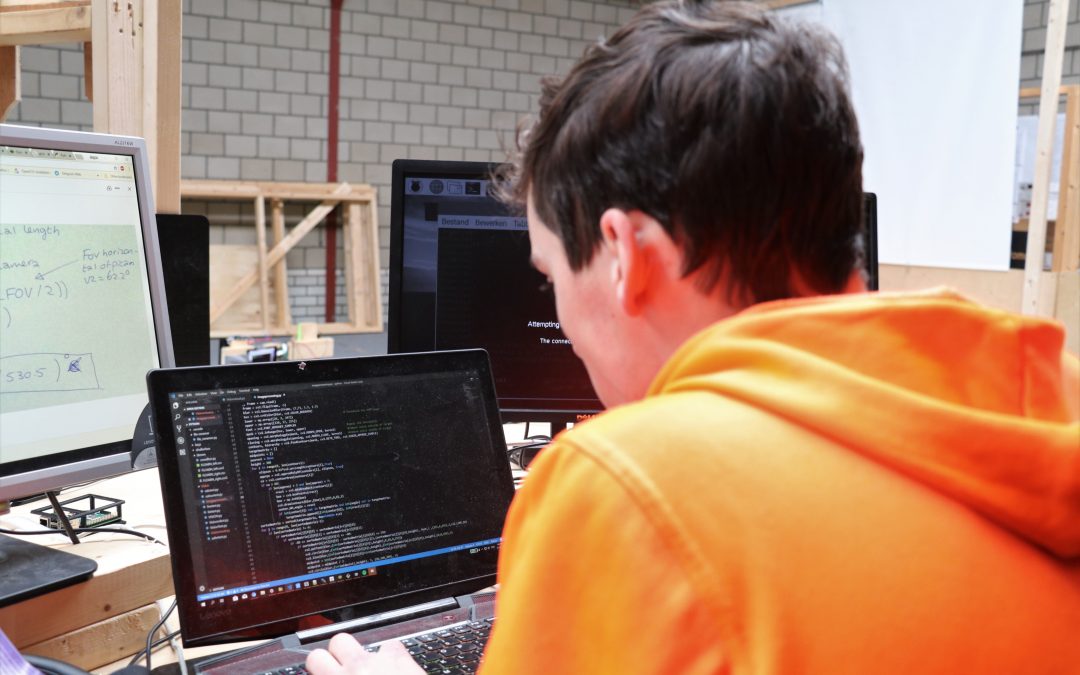
A robot will not work without software. While the robot for the Destination: Deep Space game isn’t built yet, doesn’t mean that our programmers can lay back and wait. On the contrary, our programmers are already working hard to make sure that have a program for the robot when it is built. As is explained, in the game animation, during the first 15 seconds of the game, called the Sandstorm period, the driver vision will be blocked. During these 15 seconds, we can operate our robot autonomously, driving blind, or using visual feedback. We have chosen to combine autonomously and using visual feedback. We want to drive our robot near an objective and then push a button which activates the autonomous part. To make sure that our drivers can see, we will be using a camera. With this camera, we not only send a live stream to our drivers but also use it to let our robot see during an autonomous program.
Vision
Vision is a concept of target recognition, in which a ring around the camera sends out a beam of light to retroreflective targets in its vicinity. These retroreflective targets send back the received beam to the camera. The received data can be compiled and used.
For our vision setup, we use a raspberry-pi 3, PiCAM and 3 bright green led rings. We use a raspberry-pi 3 as a co-processor to release stress on the RoboRIO. The RoboRIO is an Advanced robotics controller from National Instruments. Every team has to use the RoboRIO to communicate with the competition field. With the 3 bright green led rings we want to get enough light in the camera (PiCAM) at a sufficient distance.
We started Vision coding by installing the required libraries for Python. We used Python, like OpenCV and numpy for our coding language. After much struggle, we got the library working.
First, we opened the PiCAM. Before we are able to use the data of the PiCAM, we have to change the data. Begin by putting the data through an HSV (Hue, Saturation, Value) filter. Which filters all the colors except for the ones we want to use. In our case the returning color from the vision tapes is green. After we put the data through the HSV filter, we blur the image to remove noise and rough edges. After this, we used the opening and closing variables of OpenCV to further filter out the noise inside and outside of the target. This gives us a nice and clean black and white image to work with. In this black & white image, we calculated the contour area of each target. Next, we created a matrix to store the angles of the targets with their corresponding x-coordinates. With this matrix, we drew lines on the image, calculated the midpoints and angles of them. That is how far we are currently. These midpoints and angles values will be sent to the RoboRIO. The values will be used to drive the robot to the correct position.

AUTO-ALIGNING
Auto-aligning is a technique that we will be using to make sure the robot is perfectly aligned to the target. With vision, we will send the xpixel of the targets mid-point to the RoboRIO. We program in the RoboRIO with the program language LabVIEW. In LabVIEW, the xpixel will be converted to the yaw angle by using the equation below.

To calculate the yaw angle we first need to calculate the focal length. This is done with the following equation:

Ex:
Team Rembrandts uses the Raspberry Pi Camera Module V2. The image width is 640 pixels and the horizontal field of view is 62.2°. So the focal length would be the following:

The camera gives that the target is at an xpixel of 100. So then the yaw angle would be the following:

This is how the formula would look like in LabVIEW. Where X-pixel is received from the Raspberry Pi’s camera module, send to the RoboRIO and the Yaw Angle is the output which will be used as a set point.

This is the LabVIEW code for auto-aligning by manually giving the setpoint without reading the X-pixel, which is something that will be implemented soon. By pressing button 1 the NavX yaw angle resets back to 0. By holding the button 0 on the joypad the loop will run. First, it reads the yaw angle from the NavX, which will be the process variable of the PID controller and the manual setpoint is just any number of -179 to 179. -0.95 and 0.95 are values that shows what the maximum output will be for the motors. So, now the maximum they can go is 95%. 20 is the dt in seconds. 0.1, 3 and 0.5 are values of the P, I and D. These values are determined by tuning and using the graph which would look something like the graphic below:


So here the setpoint was 45 degrees, where it keeps running the motors and slowly decreases the output to get it closer to the 45 degrees. Thanks to the PID controller the output stops almost exactly at 45 degrees.
The following things we still have to achieve for auto-aligning. To integrate it together with vision. Adding a way where the NavX resets once before it loops after pressing the button 0 on the joypad. Then change these codes into classes.
MOTION PROFILING
We have also been working on motion profiling. This is a way to let the robot drive autonomous. It will follow a pre-programmed path, this path is generated with the use of a motion profile generator. In this motion profile generator, we can add points and it will calculate the position and velocity for every given time interval.


This is the code for reading the .csv files and putting them into the buffer.
The calculations are handled in the subvi.


Podcast aflevering over generatieve AI voor trainers, coaches en docenten
In deze eerste aflevering (van een serie) over Generatieve AI voor het onderwijs, zal ik mijn kennis en ervaring delen over het concrete toepassingen van generatieve AI in het onderwijs.
Over Ronald Scheer
Ronald Scheer is an educator based at Fontys University of Applied Sciences in Eindhoven. Ronald is deeply engaged in the field of Engineering and is associated with the Robotics & Mechatronics professorship. In addition to his teaching role, he wears the hat of a skilled video and podcast creator within the professorship. Beyond the classroom, Ronald extends his expertise to assist fellow educators in crafting engaging learning materials for both online and classroom activities. His passion lies in enhancing the educational experience through multimedia content creation and innovative teaching methodologies.
- Web |
- More Posts(156)
How I used NotebookLM as my AI assistent to create a podcast with just a URL
Not every student has the same learning style. Some students like to read, while others like to listen to audio (e.g. podcast) about topics of their interest. From today you can offer your students both, with almost no effort from you…
Over Ronald Scheer
Ronald Scheer is an educator based at Fontys University of Applied Sciences in Eindhoven. Ronald is deeply engaged in the field of Engineering and is associated with the Robotics & Mechatronics professorship. In addition to his teaching role, he wears the hat of a skilled video and podcast creator within the professorship. Beyond the classroom, Ronald extends his expertise to assist fellow educators in crafting engaging learning materials for both online and classroom activities. His passion lies in enhancing the educational experience through multimedia content creation and innovative teaching methodologies.
- Web |
- More Posts(156)
Hoe ik ChatGPT Gebruik om de Beste Podcasts te Maken!
Als docent heb je veel kennis om te delen met jouw studenten. Podcast is een fantastisch middel om jouw lessen te verdiepen en te verbreden. De eerste stap die je het beste kan zetten is…
Over Ronald Scheer
Ronald Scheer is an educator based at Fontys University of Applied Sciences in Eindhoven. Ronald is deeply engaged in the field of Engineering and is associated with the Robotics & Mechatronics professorship. In addition to his teaching role, he wears the hat of a skilled video and podcast creator within the professorship. Beyond the classroom, Ronald extends his expertise to assist fellow educators in crafting engaging learning materials for both online and classroom activities. His passion lies in enhancing the educational experience through multimedia content creation and innovative teaching methodologies.
- Web |
- More Posts(156)
Hoe ik ChatGPT gebruik om Docenten Handleidingen te verbeteren
Heb je vragen hoe AI jouw onderwijs kan verbeteren? Neem gerust contact met mij op!
Over Ronald Scheer
Ronald Scheer is an educator based at Fontys University of Applied Sciences in Eindhoven. Ronald is deeply engaged in the field of Engineering and is associated with the Robotics & Mechatronics professorship. In addition to his teaching role, he wears the hat of a skilled video and podcast creator within the professorship. Beyond the classroom, Ronald extends his expertise to assist fellow educators in crafting engaging learning materials for both online and classroom activities. His passion lies in enhancing the educational experience through multimedia content creation and innovative teaching methodologies.
- Web |
- More Posts(156)
A Teacher’s Guide to unlock the Power of Text-to-Video AI Technology
Text-to-Video AI: a powerful tool that can transform the way you create lessons for your students. In this blog post, I will explore how teachers can harness the potential of AI tools like ChatGPT, Invideo and Fliki to craft captivating and educational video lessons.
Over Ronald Scheer
Ronald Scheer is an educator based at Fontys University of Applied Sciences in Eindhoven. Ronald is deeply engaged in the field of Engineering and is associated with the Robotics & Mechatronics professorship. In addition to his teaching role, he wears the hat of a skilled video and podcast creator within the professorship. Beyond the classroom, Ronald extends his expertise to assist fellow educators in crafting engaging learning materials for both online and classroom activities. His passion lies in enhancing the educational experience through multimedia content creation and innovative teaching methodologies.
- Web |
- More Posts(156)

 Vind ik leuk
Over Team Rembrandts
Rembrandts STEAM Foundation is a Dutch Non-Profit organization that started as the First native Dutch robotics team, also known as Team Rembrandts. Team Rembrandts, team 4481, is a robotics team located in Eindhoven with students from Fontys University of Applied Science, Zwijsen College and Heerbeeck College. HBO, WO, MBO and High school combined all together.